
[웹 UI 개발] 폼 - 4 / 폼 커스텀 (셀렉트 메뉴)
2023. 3. 29. 13:08
select는 부분적으로 css를 통해 스타일링할 수 있지만 select가 노출될 때 표현되는 화살표 모양의 버튼은 css로 세부적인 스타일링이 힘들다.
그리고 필수적으로 있어야 하는 <option> 요소는 css로 커스텀이 아예 불가능하다.
이런 요소들을 모두 커스텀하기 위해서는 <selelct> 태그를 이용해서 만들기 보다는 드롭다운 형태의 메뉴를 만들어서 스크립트 개발로 <select>와 비슷한 기능을 구현하는 많이 사용하게 된다.
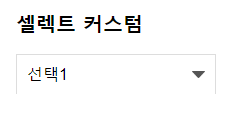
이번에는 기본 <select> 태그의 화살표를 간단하게 커스텀하는 방법에 대해서만 알아본다.
<!DOCTYPE html>
<html lang="ko">
    <head>
        <meta charset="UTF-8">
        <title>select</title>
        <link rel="stylesheet" href="css/reset.css">
        <link rel="stylesheet" href="css/select.css">
    </head>
    <body>
        <h1>셀렉트 커스텀</h1>
        <div class="select_form">
            <select name="" id="">
                <option value="">선택1</option>
                <option value="">선택1</option>
                <option value="">선택1</option>
            </select>
        </div>
    </body>
</html>
@charset "UTF-8";

body {
    padding: 50px;
}

h1 {
    margin: 50px 0 20px;
    font-size: 20px;
    font-weight: bold;
}

/*여기서부터 커스텀 코드*/

.select_form {
    position: relative;
    width: 198px;
    height: 38px;
    line-height: 38px;
    border: 1px solid #ddd;
}

.select_form::after {
    position: absolute;
    top: 16px;
    right: 10px;
    display: block;
    background: url(../img/select.png) no-repeat 0 0;
    width: 13px;
    height: 7px;
    content: "";
}

.select_form select {
    width: 100%;
    height: 100%;
    border: 0 none;
    font-size: 16px;
    padding: 0 0 0 10px;
    appearance: none;
}
.select_form {
    position: relative;
    width: 198px;
    height: 38px;
    line-height: 38px;
    border: 1px solid #ddd;
}
select_form을 원하는 크기대로 커스텀해준다.
.select_form select {
    width: 100%;
    height: 100%;
    border: 0 none;
    font-size: 16px;
    padding: 0 0 0 10px;
    appearance: none;
}
select_form에 있는 select를 select_form 크기에 맞추고 border를 없앤다.
그리고 appearance 속성을 사용해서 select 기본 모양의 화살표를 없애 준다.
.select_form::after {
    position: absolute;
    top: 16px;
    right: 10px;
    display: block;
    background: url(../img/select.png) no-repeat 0 0;
    width: 13px;
    height: 7px;
    content: "";
}
select_form에 after 가상요소를 사용해서 준비한 화살표 이미지를 추가한다.
부스트코스의 강의 내용을 정리한 포스트입니다.
https://www.boostcourse.org/web344
웹 UI 개발
부스트코스 무료 강의
www.boostcourse.org
'공부 > 웹 UI 개발' 카테고리의 다른 글
| [웹 UI 개발] 반응형 웹 - 1 / 태블릿 PC 환경 (0) | 2023.03.30 |
|---|---|
| [웹 UI 개발] 반응협 웹 - 0 (0) | 2023.03.30 |
| [웹 UI 개발] 폼 - 3 / 폼 커스텀 (파일 찾기 버튼) (0) | 2023.03.29 |
| [웹 UI 개발] 폼 - 2 / 폼 커스텀 (체크 박스, 라디오 버튼) (0) | 2023.03.27 |
| [웹 UI 개발] 폼 - 1 / 폼 커스텀 (텍스트 박스) (0) | 2023.03.27 |